
Prerequisites
Section titled “Prerequisites”- A domain or subdomain dedicated to FOSSBilling.
- A server that meets the system requirements.
- A web server running a FOSSBilling-compatible configuration.
Web Server Configuration
Section titled “Web Server Configuration”Apache usually requires no extra application-specific configuration. The templates below for other web servers should be treated as starting points and adjusted for your own paths, SSL settings, and deployment conventions.
FOSSBilling includes a ready-to-use .htaccess file for Apache and LiteSpeed / OpenLiteSpeed. Set up your domain as you normally would, then proceed with installation.
OpenLiteSpeed users: After installation, remember to reload the web server so it picks up the new .htaccess file.
Use the configuration below as a starting point for running FOSSBilling on NGINX. Be sure to replace placeholder values (like %%DOMAIN%% and %%SOURCE_PATH%%) and adjust SSL paths to match your environment.
server {  listen 80;  listen [::]:80;  server_name %%DOMAIN%%;  return 301 https://$host$request_uri;}
server {  listen 443 ssl http2;  listen [::]:443 ssl http2;  ssl_certificate      /path/to/ssl/certificate.crt;  ssl_certificate_key  /path/to/ssl/certificate.key;  ssl_stapling on;  ssl_stapling_verify on;
  server_name %%DOMAIN%%;  root %%SOURCE_PATH%%;  index index.php;  sendfile off;  include /etc/nginx/mime.types;
  # Serve existing files directly; otherwise hand off to the front controller.  try_files $uri $uri/ /index.php$is_args$args;
  # Block access to sensitive files and file types  location ~* \.(ini|sh|inc|bak|twig|sql|conf|lock|log|old|ya?ml|htaccess|htpasswd)$ {    return 403;  }
  # Block /vendor completely  location ^~ /vendor/ {    return 403;  }
  # Block access to per-theme configuration directories  location ~* ^/themes/[^/]+/config/ {    return 403;  }
  # Block access to hidden files except .well-known (needed for ACME challenges)  location ~ /\.(?!well-known\/) {    return 403;  }
  # Deny access to runtime data  location ^~ /data/ {    return 403;  }
  # Only these entry points are allowed to run through PHP-FPM.  location ~ ^/(index\.php|ipn\.php|install/index\.php|install/install\.php)$ {    # fastcgi_pass needs to match your PHP-FPM setup. FOSSBilling requires PHP 8.3+,    # so the socket is often something like /run/php/php8.3-fpm.sock.    # A TCP address such as 127.0.0.1:9000 also works.    # Please check your server setup.    fastcgi_pass unix:/run/php/php8.3-fpm.sock;    fastcgi_param SCRIPT_FILENAME $document_root$fastcgi_script_name;    fastcgi_intercept_errors on;    include fastcgi_params;  }
  # Block direct execution of every other PHP file  location ~* \.php$ {    return 403;  }}
Migrating from BoxBilling? The .htaccess file aliases the old bb-ipn.php callback to ipn.php and translates its legacy bb_invoice_id, bb_gateway_id, bb_redirect, and bb_invoice_hash query parameters, since old PayPal recurring-payment IPN URLs can't be updated after the fact. The NGINX config above doesn't replicate this. If you still receive callbacks at the old URL or parameter names, either use Apache/LiteSpeed instead, or add an equivalent rewrite for your NGINX setup.
Pre-installation Steps
Section titled “Pre-installation Steps”- Download FOSSBilling: Download the latest stable release from our downloads page.
- Prepare your database: Create a new MariaDB/MySQL database and a dedicated user for this installation. Keep the credentials handy for the installer.
- Set up SSL: If you plan to use HTTPS, and you should, configure and verify your certificate before you start the installer.
- Configure reverse-proxy headers: If you run behind a reverse proxy, forward the
X-Forwarded-HostandX-Forwarded-Protoheaders so FOSSBilling can generate the correct URLs and enforce HTTPS properly.
Installation Steps
Section titled “Installation Steps”Clean your document root: Remove placeholder files created by your control panel, such as default index pages or sample
.htaccessfiles, so they do not interfere with routing.Upload and extract FOSSBilling: Upload the release you downloaded and extract it into your document root. Your directory should look similar to this:
Directorydata/
- …
Directoryinstall/
- …
Directorylibrary/
- …
Directorylocale/
- …
Directorymodules/
- …
Directorythemes/
- …
Directoryvendor/
- …
- config-sample.php
- cron.php
- di.php
- index.php
- load.php
- ...
Launch the installer: Visit the domain you set up for FOSSBilling. If you are using HTTPS, access it over
https://so the application configures secure URLs automatically.If you see the FOSSBilling installer welcome page below, you're ready to proceed.
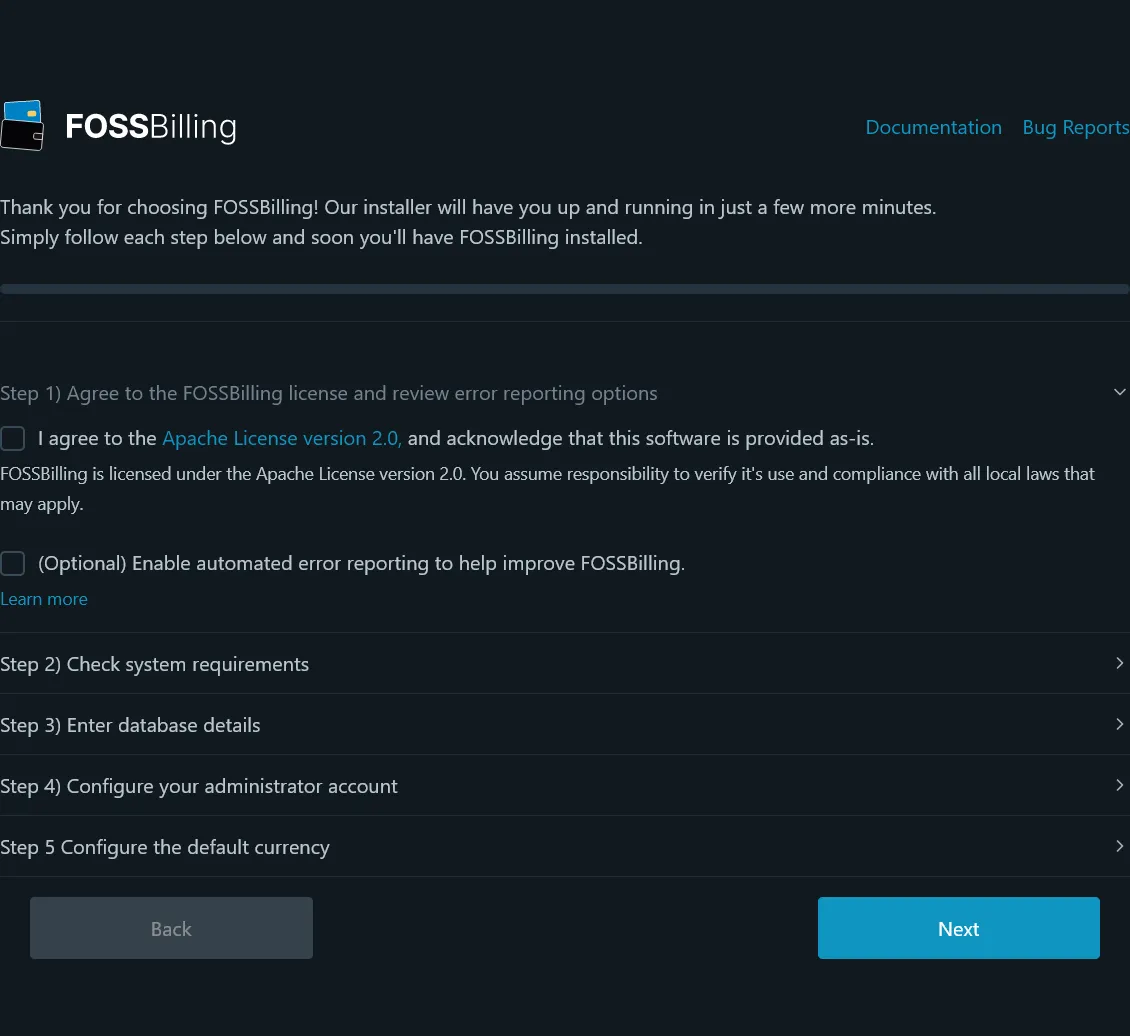
Complete the setup wizard: Follow the on-screen steps to accept the license, enter your database credentials, and create your administrator account.
Confirm the public URL: The installer shows a suggested FOSSBilling URL based on how you accessed it. Verify this is the correct public address for your installation (e.g.,
https://billing.example.com/).Configure reverse proxy (if detected): If the installer detects forwarded headers from a reverse proxy, it shows a proxy configuration step where you can enable trusted proxy support and review the detected settings. Only enable this if the detected proxy is one you control and trust.
Configure the default currency: Select your currency code (e.g.,
USD,EUR). The price format is auto-generated; place your currency symbol before or after the{{price}}placeholder, for example{{price}} USDor$ {{price}}.Install: Click install and wait for the success page to appear.
Post-installation Steps
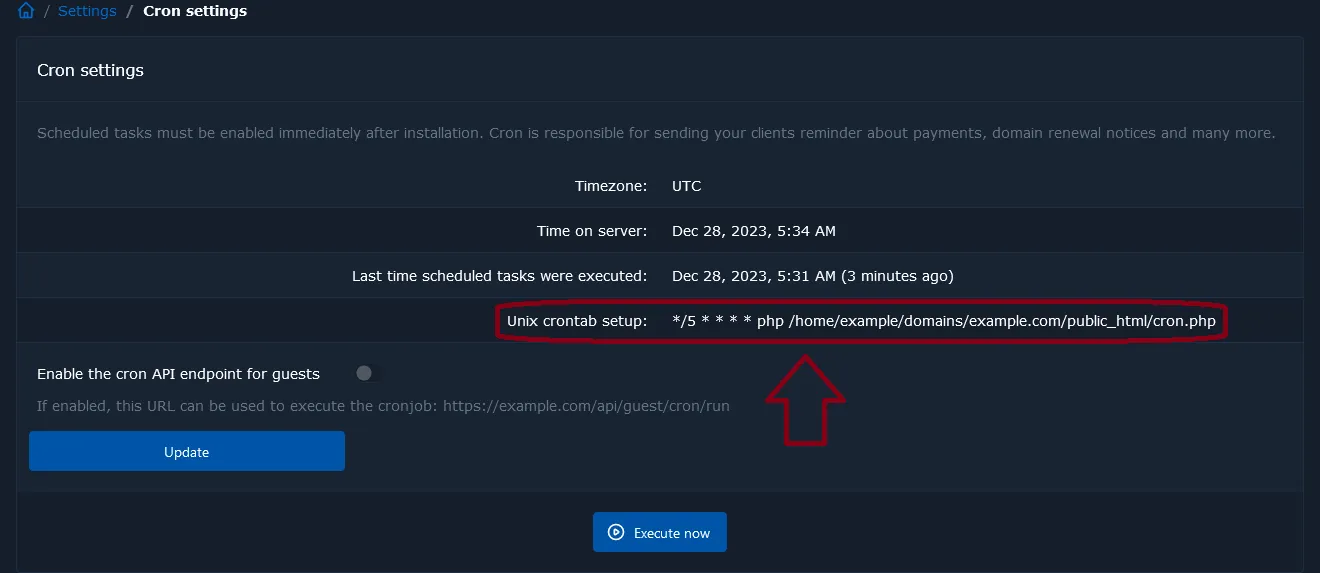
Section titled “Post-installation Steps”Once the installer finishes, configure the cron job before you begin using the system as soon as possible.
Configuring the Cronjob
Section titled “Configuring the Cronjob”FOSSBilling relies on cron to handle renewals, expired orders, email delivery, background checks, and other scheduled work. It needs to be configured correctly, run consistently, and execute often enough to keep the platform healthy.
We recommend running cron every five minutes. If more than 15 minutes pass without a run, FOSSBilling will show a warning in the admin panel. Treat the warning as urgent. 
Local Cron Job
Section titled “Local Cron Job”FOSSBilling shows the correct cron command on the installation-complete screen and again in the admin panel. If you need to find it later, go to Settings -> Scheduled Tasks (/admin/extension/settings/cron).